Empowering Your Applications with Lipa na M-Pesa: Leveraging Express, Node.js and the Daraja API

I am a passionate full-stack software developer in the MERN stack. With a deep love for coding and problem solving, I thrive in creating robust and scalable applications that deliver seamless user experiences.
As a developer, I'm driven by the desire to build elegant and efficient solutions that meet the unique requirements of each project. I enjoy working collaboratively, brainstorming ideas, and translating them into clean, maintainable code. From conceptualization to deployment, I take pride in delivering high-quality applications that exceed expectations.
Introduction:
In today's digital era, mobile payment solutions have revolutionized the way we conduct financial transactions. One such popular mobile payment is Lipa na M-Pesa, a service offered by Safaricom, Kenya's leading telecommunication provider. Lipa na M-Pesa allows users to make payments conveniently using their mobile phones, offering a secure and efficient method for conducting transactions.
We can leverage the power of the Daraja API to integrate Lipa na M-Pesa into our apps seamlessly. The API empowers developers to interact with various M-Pesa functionalities programmatically enabling us to incorporate Lipa na M-Pesa into our applications effortlessly.
In this article, we will dive into the Daraja API for Lipa na M-Pesa and explore how we can leverage popular technologies like Express, Nodemon, Cors, Axios, Dotenv and Moment to build a robust server that interacts with the API. We will also test our API using the popular lightweight Rest Client for testing APIs in VS Code - Thunder Client. We will walk through the process of setting up the server, implementing authentication, and creating routes for initiating STK (Sim Toolkit) Push requests.
By the end of this article, you will have a comprehensive understanding of how to utilize the Daraja API to integrate Lipa na M-Pesa into your applications, enabling you to harness the power of mobile payments and provide a seamless user experience.
So let's get started and unlock the potential of the Daraja API for Lipa na M-Pesa!
Folder Structure and Installations
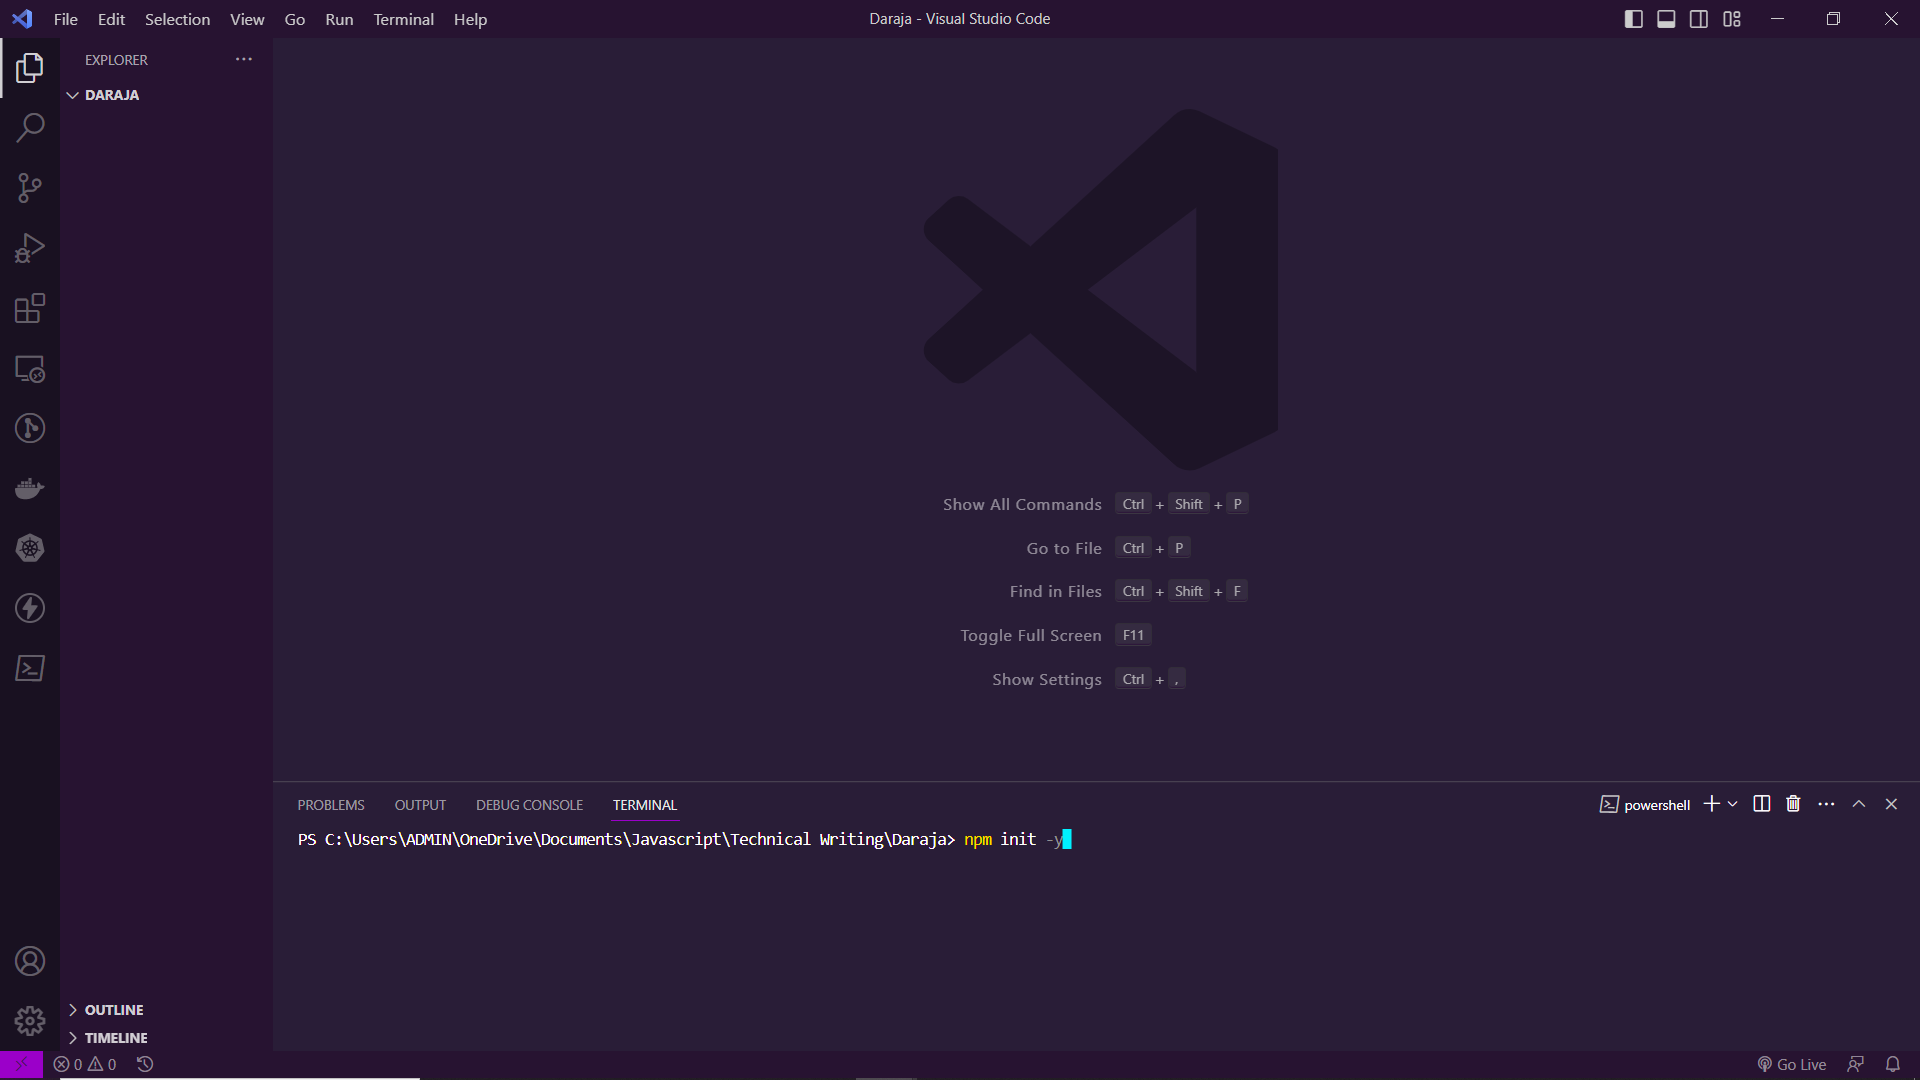
Create a new folder, and open it in VS Code. Open a new terminal then type the command:
$ npm init -y
The above command generates a package.json file that will initialize a new Node.js project with default settings. The new contents of your folder will include a package.json file
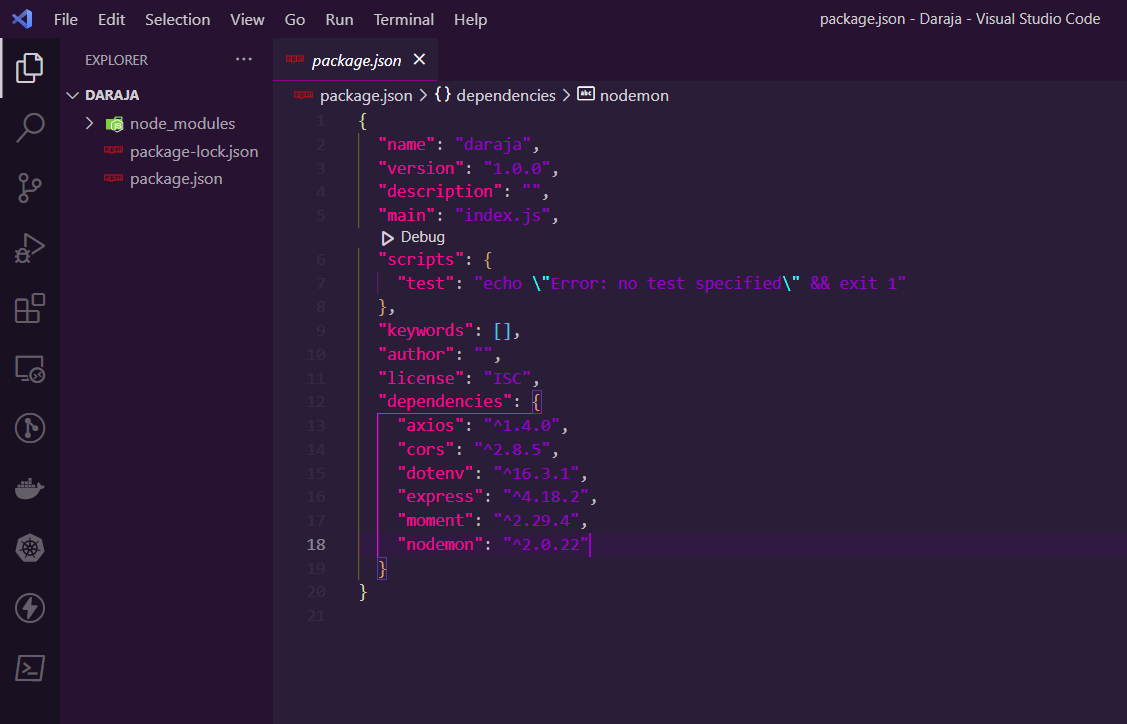
$ npm install nodemon axios dotenv cors express moment
Run the above command in your terminal to install all the packages we require for this project. Now your package.json file should be like the below screenshot, containing the packages installed.
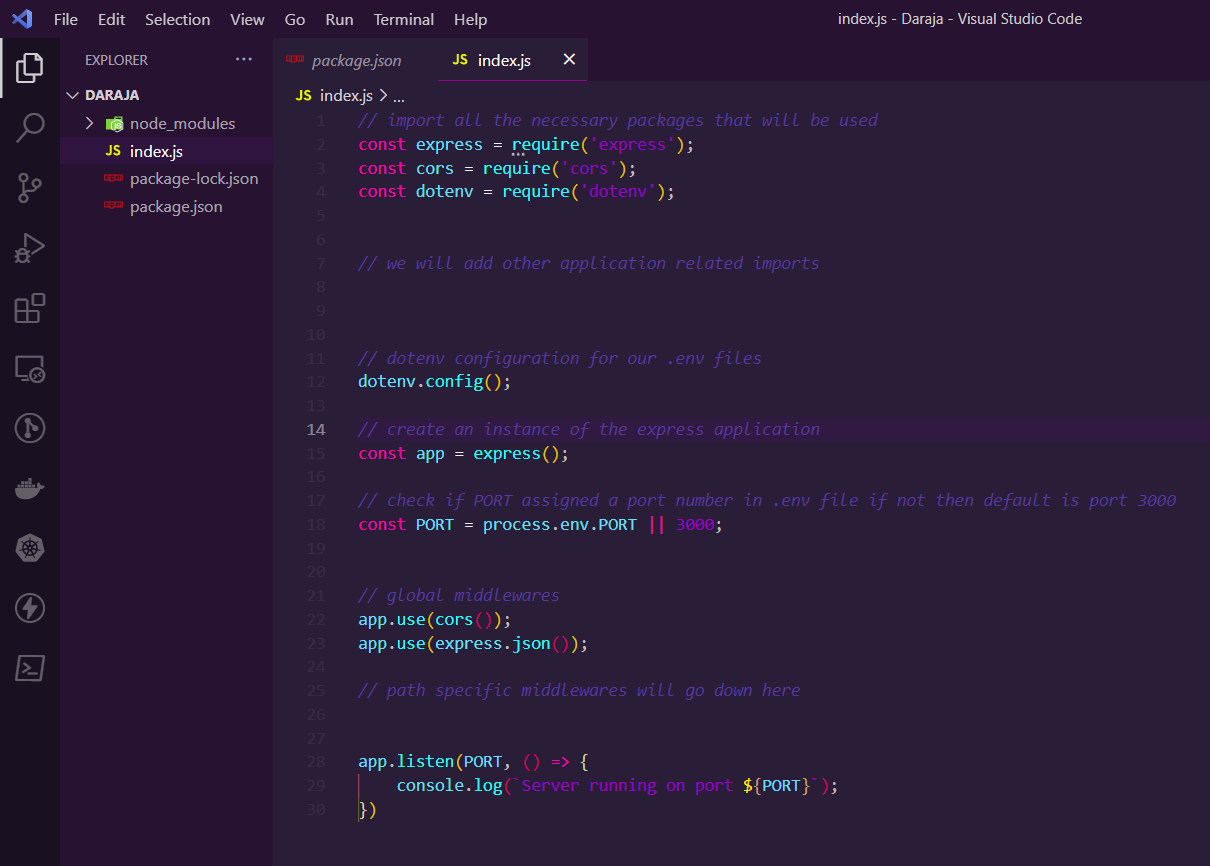
Next, we are going to create our index.js file that will act as our express server. So create the new file and update it with the code below:
To test if our server is running, we have to add a script in our package.json file. Your scripts object should look like this:
{
  "scripts": {
  "test": "echo \"Error: no test specified\" && exit 1",
  "dev": "nodemon index.js"
  },
}
Now on your terminal, type the command npm run dev and our server will be started by nodemon. The console prints Server running at port 3000 This is because we don't have a .env file with the PORT variable assigned to a port number. Let's add a .env file in the root of our application and add the PORT variable to it.
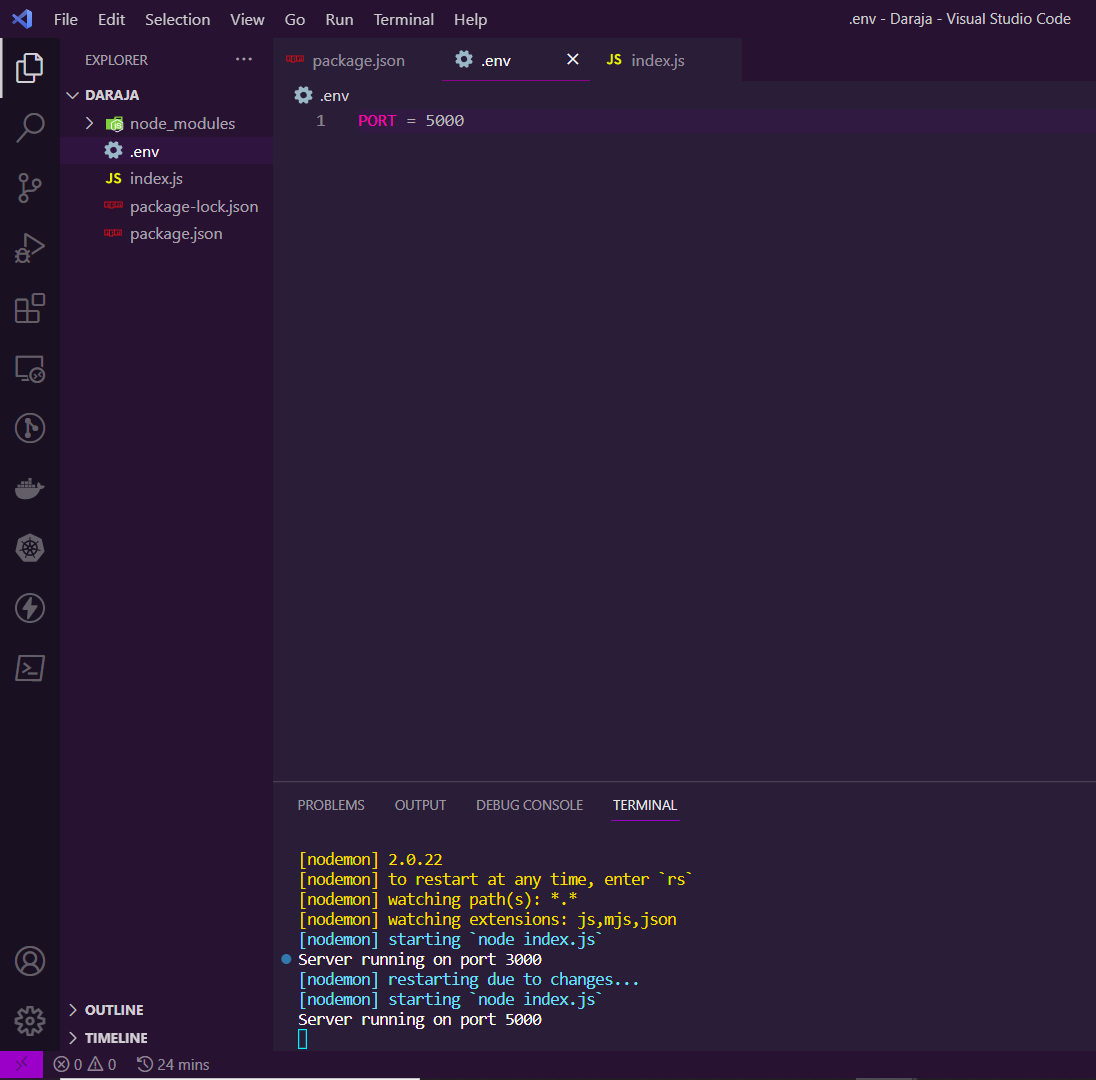
When you make changes to the index.js file or run npm run dev in your terminal, you will see the server running at the port you specified.
Setting up Sandbox App and Credentials
To make API calls using the Daraja API we need to have an app running on our sandbox. Visit the Safaricom developers portal to create an account and a new application that will generate for you the credentials necessary for our application.
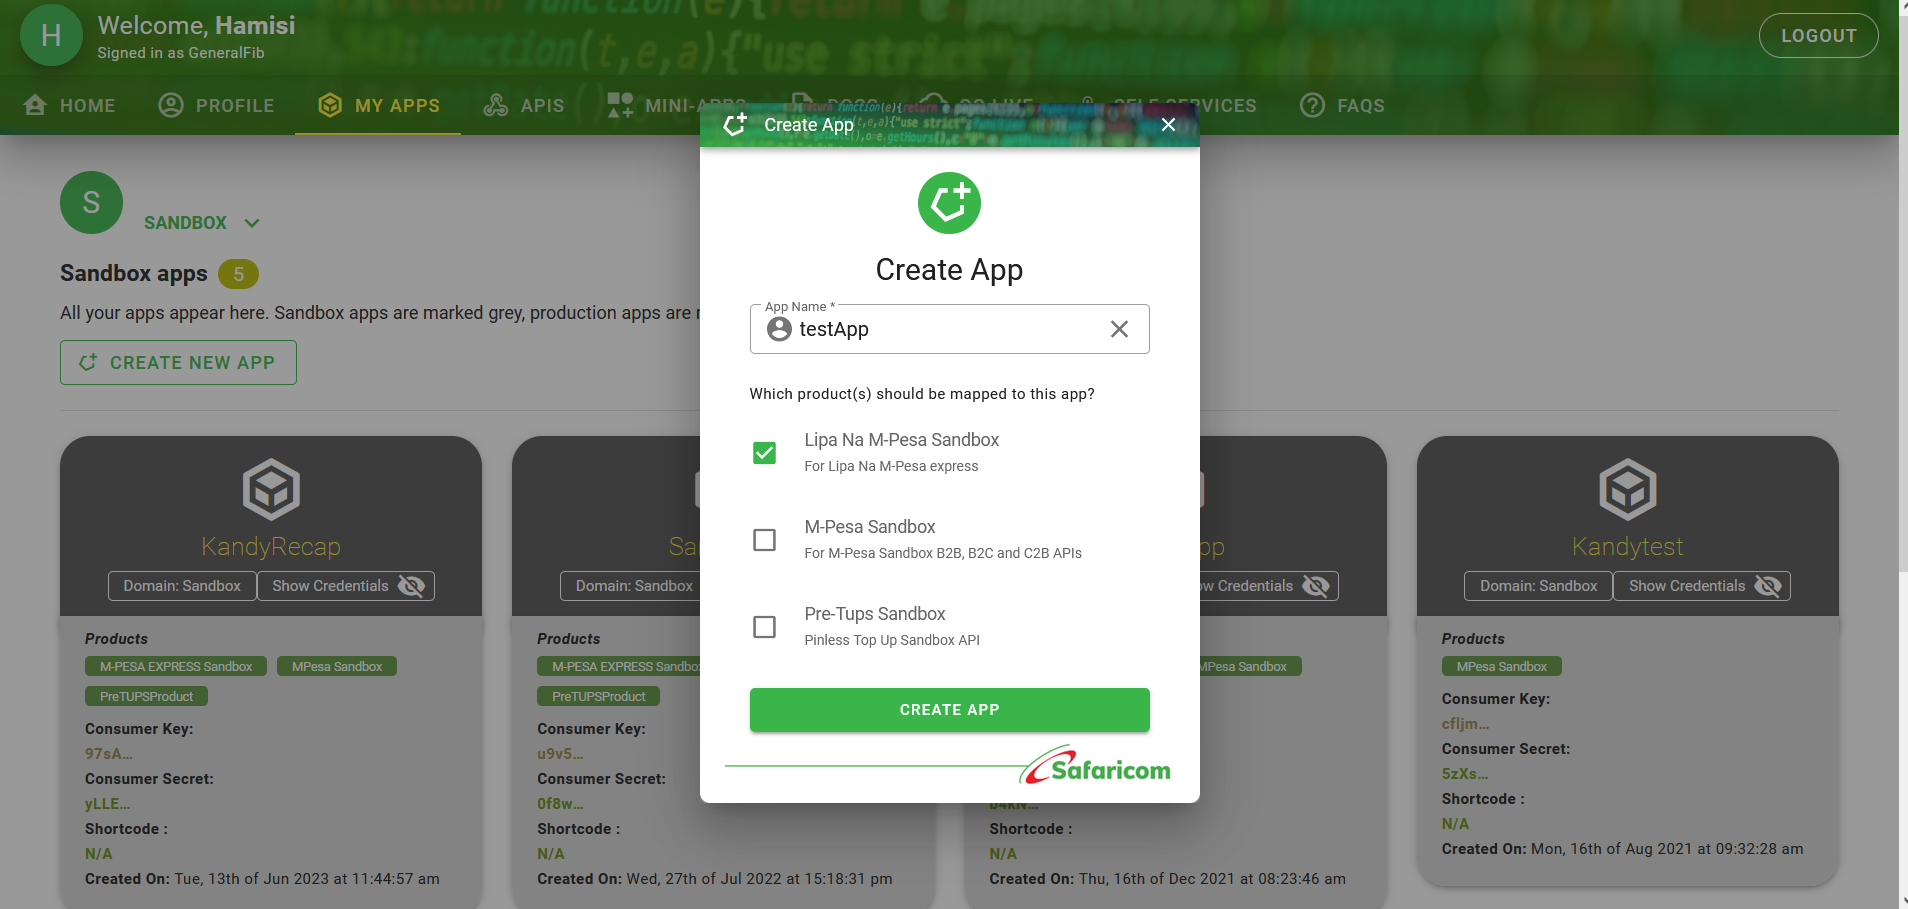
Ensure Lipa na M-Pesa checkbox is checked. The credentials we will use can be visible when you click the Show Credentials button. copy the Consumer Key and Consumer Secret in your .env file
CONSUMER_KEY = //your consumer key
CONSUMER_SECRET = //your consumer secret
SHORTCODE = 174379 // must be this number
PASS_KEY = //your pass key got from daraja API MPesa express simulator
Lipa Na M-Pesa Authorization
Let's create a new folder at the root of our application called middlewares Inside it add a file called auth.js which will handle our Lipa na M-Pesa authorization. Add the code below to your file:
const axios = require('axios');
require('dotenv').config();

// creating a middleware function that will handle the authentication

const authenticate = async (req, res, next) => {

    const secret = process.env.CONSUMER_SECRET;
    const consumerKey = process.env.CONSUMER_KEY;

    // generating a Basic Authorization which is a Base64 Encode of (Consumer Key : Consumer Secret)
    const auth = new Buffer.from(`${consumerKey}:${secret}`).toString('base64');

  try {

    // the response object contains another object called data
    // we are going to get the data object directly via object destructuring

    const { data } = await axios.get(
        // the recommended url endpoint can be found in MPESA express api docs
      'https://sandbox.safaricom.co.ke/oauth/v1/generate?grant_type=client_credentials',
      {
        headers: {
          Authorization: `Basic ${auth}`
        },
      }
    );

    // assigning the access_token retrieved from the authentication process to the
    // access_token property of the request object (req)
    // we are making it available for our stkpush route
    req.access_token = data.access_token;
    next();
  } catch (error) {
    console.error('Authentication failed:', error);
    return res.status(500).json({ error: 'Authentication failed' });
  }
};

module.exports = authenticate;
Our token will now be generated. In case of any error, we will be alerted in our console and during the API testing. Now let's go ahead and create our route for the STK push.
Lipa Na M-Pesa STK push
Let's create a routes folder in our app containing a new file called stkPush.js Sometimes I run out of file names, so you can name it how you want so long as it makes sense to your fellow developers too. In the file add the following code:
// routes/stkPush.js

const express = require('express');
const moment = require('moment'); // will help us generate our timeStamp
const axios = require('axios');

// import our authenticate middleware function
const authenticate = require('../middlewares/auth');

const router = express.Router();

router.post('/stkpush', authenticate, async (req, res) => {
  try {

    // taking the phone number and amount to be paid from our req.body

    const { phone, amount } = req.body;

    // the access_token we stored in our authenticate middleware function

    const access_token = req.access_token;

    const timestamp = moment().format('YYYYMMDDHHmmss')

    // store shortcode and passkey from our .env variables
    const shortCode = process.env.SHORTCODE;
    // got from the simulator
    const passKey = process.env.PASSKEY;

    const password = new Buffer.from(shortCode + passKey + timestamp).toString(
        "base64"
    );

    // our body object visit MPESA express documentation for more details about each item
    const request = {
      BusinessShortCode: shortCode,
      Password: password,
      Timestamp: timestamp,
      TransactionType: 'CustomerPayBillOnline',
      Amount: amount,
      PartyA: phone,
      PartyB: shortCode,
      PhoneNumber: phone,
      CallBackURL: "https://kandy-hamisi.github.io/",
      AccountReference: 'Lipa Na M-Pesa Test',
      TransactionDesc: 'Lipa Na M-Pesa Test',
    };

    const { data } = await axios.post(
      'https://sandbox.safaricom.co.ke/mpesa/stkpush/v1/processrequest',
      request,
      {
        headers: {
          Authorization: `Bearer ${access_token}`,
        },
      }
    );

    res.json(data);
  } catch (error) {
    console.error('STK Push request failed:', error);
    return res.status(500).json({ error: 'STK Push request failed' });
  }
});

module.exports = router;
In the above code, we have imported the authorization middleware function so that it can be used to generate our token for the stk push. The URL used here for the post request is different from the one we used to get the token. To get more insight on the request body visit the M-Pesa Express Documentation. Remember when we said you will get your passkey from the simulator in our .env file? Let us have a look at what the simulator looks like.

The right side of the page contains a dark mode card, which is our Daraja simulator. Select an app you wish to simulate, in our case it must be the app that we used its consumer key and secret. You can see a field containing the PassKey field, copy that value into your PASS_KEY variable in your .env file. Great! We will manually input the phone number and the amount to test our API.
Finish up a server setup
Since we are done with setting up the route, we need to use it in our server let's import it in our index.js file. Your updated index.js should be something like this:
// import all the necessary packages that will be used
const express = require('express');
const cors = require('cors');
const dotenv = require('dotenv');


// we will add other application related imports
const stkPushRoute = require('./routes/stkPush');


// dotenv configuration for our .env files
dotenv.config();

// create an instance of the express application
const app = express();

// check if PORT assigned a port number in .env file if not then default is port 3000
const PORT = process.env.PORT || 3000;


// global middlewares
app.use(cors());
app.use(express.json());

// path specific middlewares will go down here
app.use('/api', stkPushRoute);

app.listen(PORT, () => {
    console.log(`Server running on port ${PORT}`);
})
Testing Our API
We said that we will test our API here using the VS code extension Thunder Client. Ensure it is installed in your VS Code. Create a new collection and give it a name of your choice, then create a new POST request in that collection. Also, give it a name that makes sense.
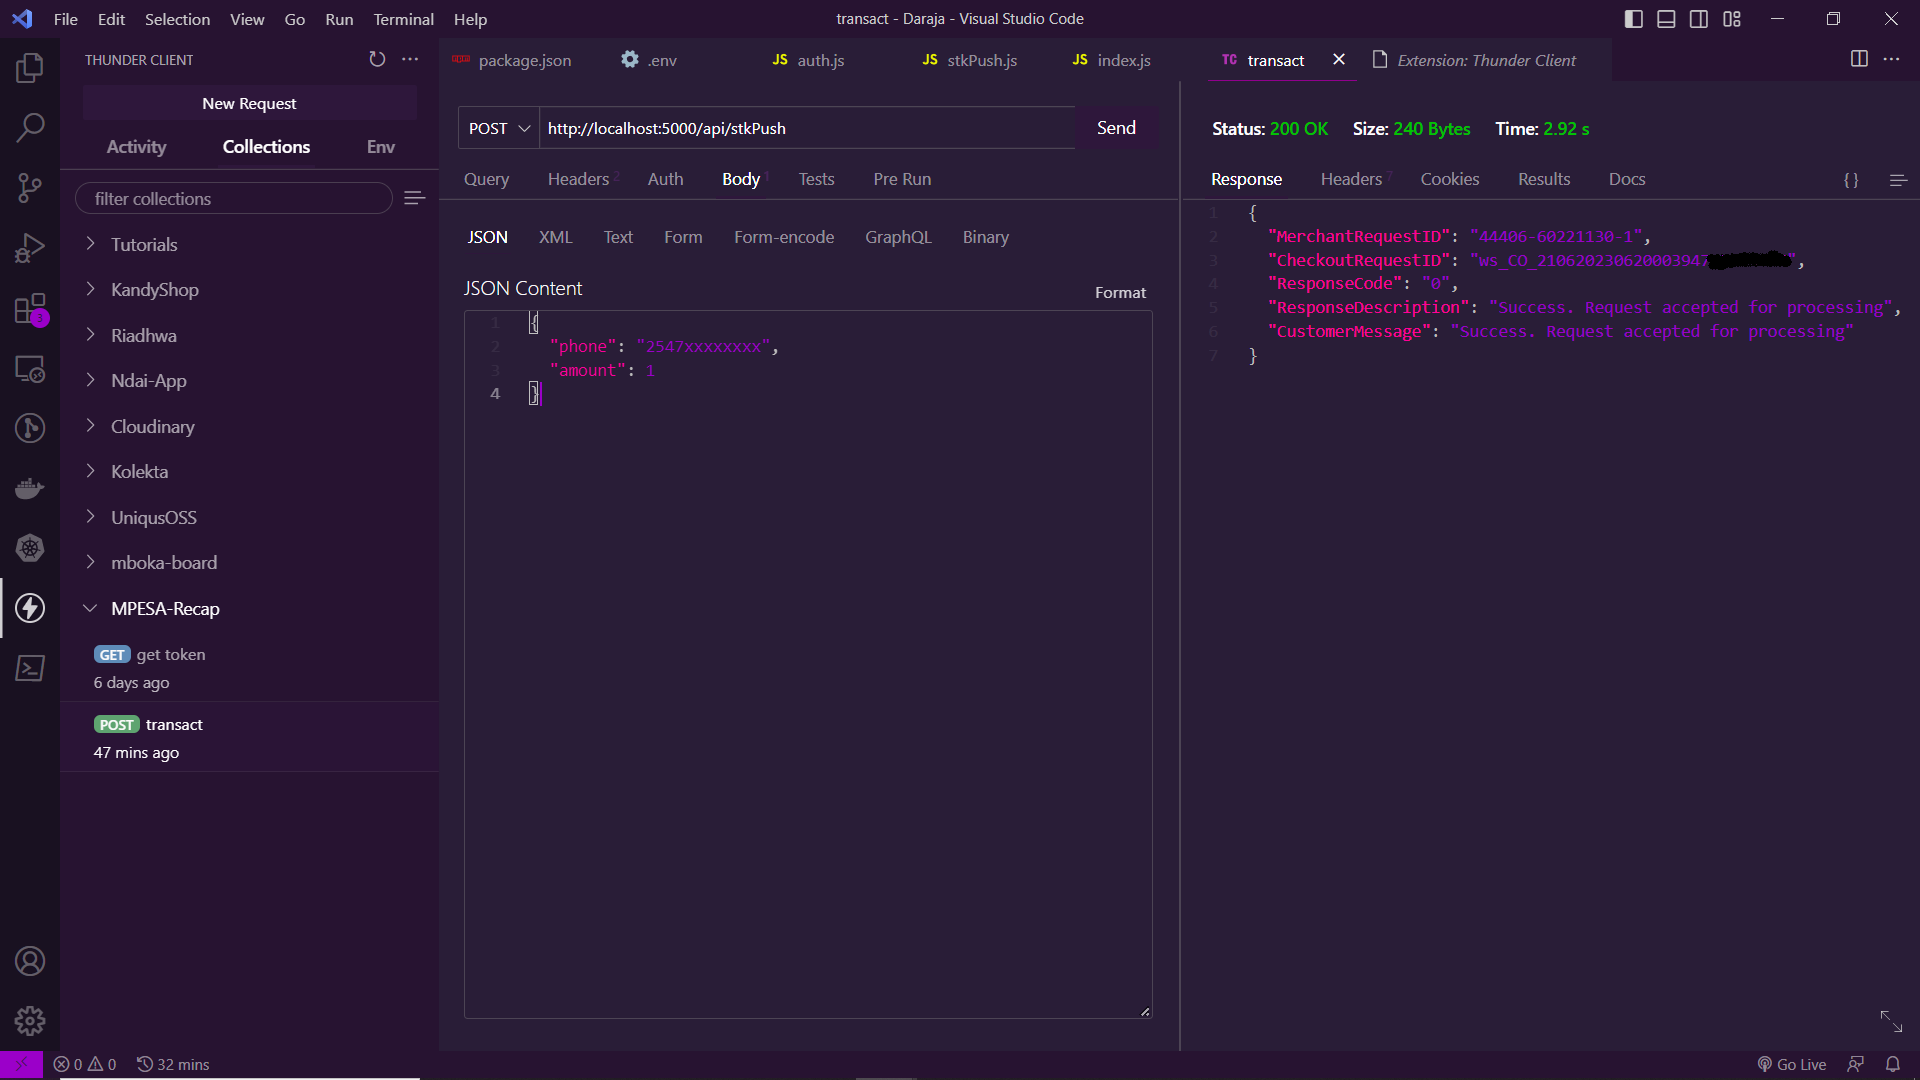
There are things that you need to note:
The URL you insert at the top of your request should be exact - directing to your route
It's a POST request so we will be using the Body section and passing a JSON object containing our data
The phone number must be in the format of
2547xxxxxxxxThroughout the app ensure that the
.envvariables are used as named
Our request has been returned and a 200 status code "OK" is displayed, meaning that it was successful. The Daraja Api also returns an object containing response parameters. That's it! You should have received a popup on your mobile phone that requires you to insert your M-Pesa pin. You can always cancel the request or accept the transaction. Reversals are done the following day at 6 AM, that is if you accepted to pay to the Daraja Sandbox.
Conclusion.
The Daraja API for Lipa na M-Pesa provides a powerful solution for integrating M-Pesa into your applications.
Through this article, we explored the process of setting up the API, implementing the necessary authentication middleware, and creating routes for performing STK Push transactions.
By understanding and harnessing the capabilities of the Daraja API, you can empower your applications with seamless and secure mobile payments, opening up new opportunities for business growth and enhanced user experiences.
Remember to refer to the official documentation and stay updated with the latest features and best practices provided by the Daraja API to ensure smooth integration and compliance with any changes or updates.
With this knowledge, you are now equipped to embark on your journey of building innovative applications that leverage Lipa na M-Pesa, bringing the convenience and reliability of mobile payments to your users.


